

Maybe you've bought tie-dyed clothes before but never attempted it yourself or maybe you're an old-pro with years of summer camp tie-dyeing experience…either way, this is a project we're sure you can master! There are so many colors and patterns you can use to make your unique vision come to life. And there’s a practical benefit to tie-dye: creating a busy canvas hides stains! Did you know that Lilly Pulitzer’s iconic colorful shift dresses were born as a way to hide stains from her juice stand in Palm Beach? Gotta love when function and fashion work together.
So today, we'll walk you through how you can use tie-dye techniques to renew your rags and hide stains. The busier the pattern and the darker the colors the better hid the stains will be, but at the end of the day these are rags– they're meant to get dirty.

To begin, you're going to need some dye. There are a lot of natural dye options (that's a whole other blog post we will write someday!), but we used some classic tie-dye that someone on our neighborhood Buy Nothing group had as leftover. It was the perfect amount for these five rags!
Dyeing works best on natural fibers such as cotton and linen (polyester won't hold the dye unless you purchase a special type that can be used on synthetic fabrics, just a heads up). To get your rags prepped to be dyed, soak them in a bath of washing soda and water for about an hour or so. This soak helps release any build-up of product that may be in the fabric and also helps open the fiber to receive the dye.

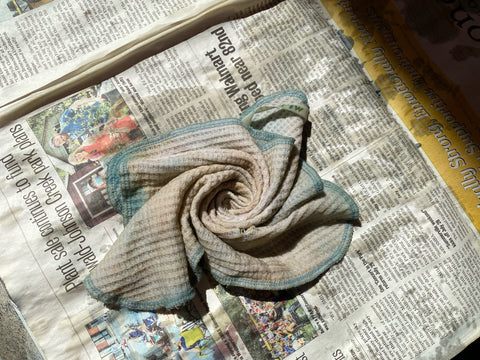
After the soak, it comes time to dye! The purpose of using some sort of "resist" dyeing (like tie-dye!) is to create variety in the patterns of color and distract from the stain itself. You can scrunch, you can twist, you can fold…get creative! For these rags we did a spiral pattern. Secure with rubber bands.

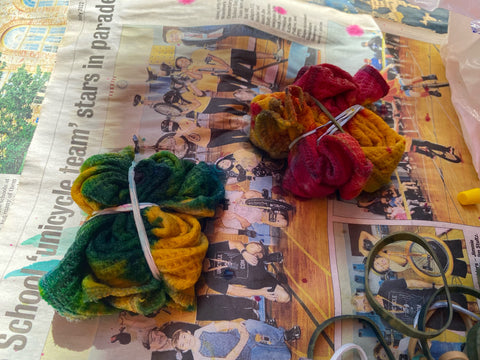
Use the dye to cover the rag, getting in the nooks and crannies and attempting to fully saturate it. If you're using more than one color, you can use the sections divided by rubber bands as guides for where to put color.
Once your rags are dyed, leave them for 24-48 hours. You can put them in a bag or container, or I just left them on the newspaper I dyed them on.

After 24 hours, we rinsed the rags while still rubber-banded. We used the hose and a large pot but you could do it inside in a sink you don't mind getting dye in. Rinse until the water runs clear, then remove the rubber-bands to see your design!
Run your rags through a wash cycle in your washing machine without detergent and with only tie-dyed items in the drum, as this will help remove any remaining dye. Then wash normally and start using your "new" rags!
Pro tip: You can always over-dye your rags if you don't like the way they came out the first time! Think of it as painting over a canvas; You can add more color or a different design!


